Delicious Homemade Butter in Under 30 Minutes
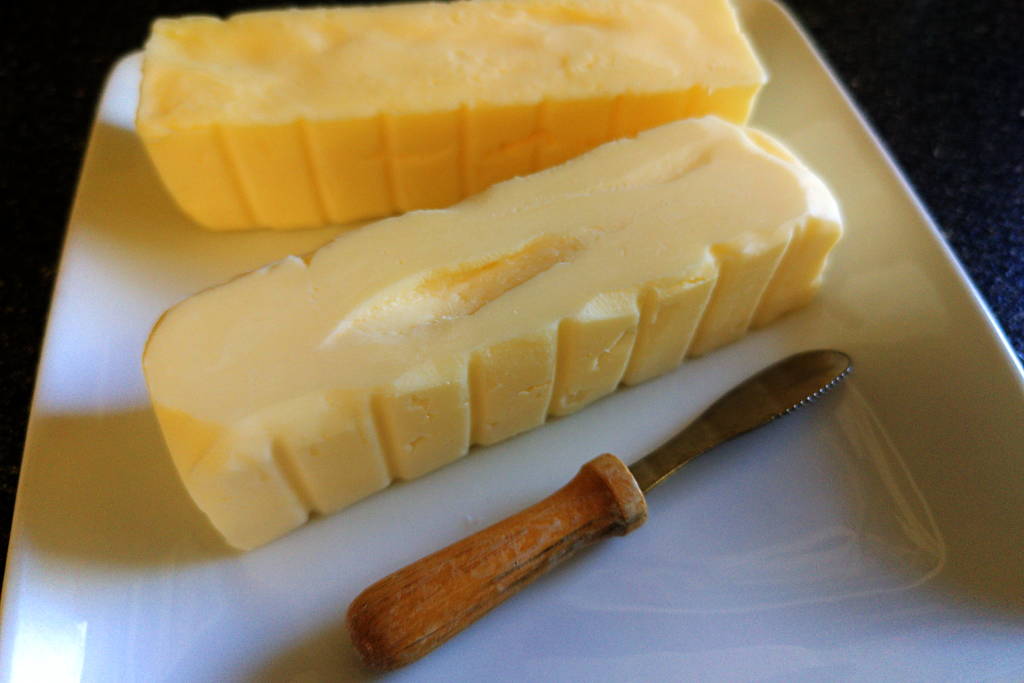
In my quest to make as much of my family’s food as homemade as possible, it is only natural that homemade butter came to my attention. Now, a year ago I never would have thought that I would be making homemade butter every week. I had always heard that butter took a long time to churn, and heavy cream at the store can be quite expensive at times.
However, my thoughts changed when we recently started participating in a herdshare (you buy a share of a dairy cow and can then get fresh, raw milk every week or so). Because of this, I had two gallons of fresh, raw milk every week. I loved seeing the thick yellow cream at the top of the gallons of milk, and I started looking into what exactly I could do with it, besides use it for coffee creamer, of course!
It was during this search that I came across homemade butter and let me tell you, I did not expect it to be so easy! For some reason, I had always believed that you needed to set aside a large portion of a day to make butter (perhaps this came from stories that my grandma told me about her family with their butter churn!). I was amazed to learn that I could have fresh, homemade butter in less than thirty minutes!
I have found that homemade butter is much sweeter and creamier than store-bought butter. The superior flavor alone has more than made up for the time it takes to make it each week. It has quickly become a part of my Friday morning routine.
Now, while I use fresh milk to make my butter, it is not a necessity. You can create an amazing, creamy butter with heavy cream from the grocery store. However, it needs to be heavy cream. Half-and-half or whole milk will not have the fat content that you need to make the butter.
Homemade butter is incredibly versatile. You can use it for any recipe that calls for butter (of course!), and you can flavor it in a variety of ways. Then there is also the delicious buttermilk that is created when you make butter, so you are really making two different things at once: butter and buttermilk!
Below I have detailed my method for creating butter, and I highly encourage you to give it a try. Once you have made your own butter, you will never want to go back to store-bought butter again!
Equipment & Tools
Mixer: You can use a hand mixer, but a stand mixer is preferred as it takes quite a bit of time to whip the cream into butter. Whichever you use, you will need the whisk attachments for the mixer. You can also try to whip or churn the butter by hand, but it will be quite an intense arm workout for you!
Splash Guard: Optional but recommended, you could also use a towel in a pinch. It just helps to keep the splattering down and makes clean up easy.
Cheesecloth or Mesh Bag: This is needed to help separate the butter from the buttermilk. You may wish to use this along with a strainer for support.
Large Mixing Bowl: This is needed if you wish to save the delicious buttermilk that will be created in this recipe!
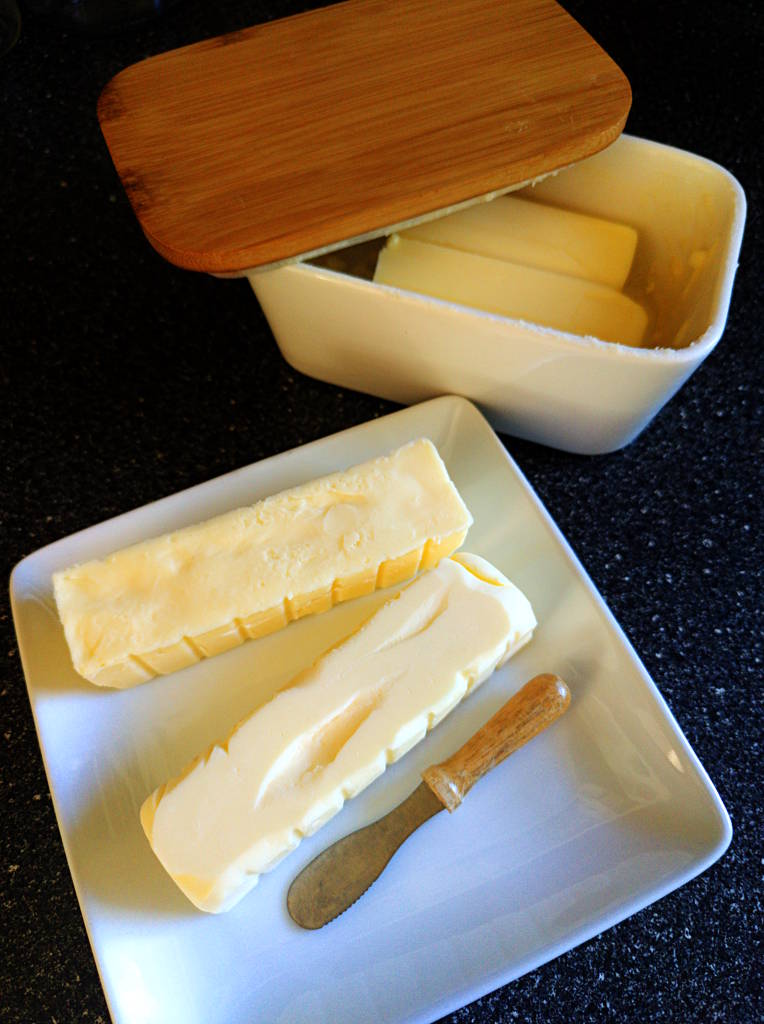
Butter Mold: A mold is optional, but it helps you to form the homemade butter into sticks, or you can find molds in different shapes! I find that this butter mold makes it easier to use the butter in recipes, as it divides each stick into tablespoons!
Digital Scale: This is optional but highly recommended. This will allow you to weigh out the butter into portions that you are used to. A stick of butter is 113g so being able to portion that exact amount to store or put into the mold will help ensure you have the right amount.
Storage Container / Plastic Wrap: Store in an airtight container or wrap the butter in order to help preserve it for a longer period of time.

Ingredients Needed
Heavy Cream: Heavy cream is absolutely necessary for this recipe. Store-bought cream works, but if you can get your hands on fresh cream, that makes an even richer butter! As with everything, the better quality ingredients, the better result!
Salt: Salt is optional, but it helps to enhance the flavors in your butter. It can also help to preserve your butter so that it lasts slightly longer in the fridge.
How to Make Homemade Butter
Chill Your Mixing Bowl: Put your mixing bowl and whisk attachment in the fridge for at least 15 minutes before you begin to make the butter. It’s important for all of the tools to be chilled in order to keep the cream as cold as possible during mixing.
Start Mixing the Butter: Once your mixing bowl is properly chilled, add the heavy cream to the mixer. Turn the mixer on medium-low speed and gradually up to high speed to start whipping the butter. It may be helpful to put a towel or splash guard around the bowl so that the cream doesn’t splatter all over your kitchen and mixer. This is especially important once the butter starts to separate from the buttermilk. The first time I made this recipe, I ended up with buttermilk-splattered cupboards and countertops, not to mention a very messy mixer!
Let the Cream Break: As you whip the cream, it will begin to form whipped cream. Keep whipping it! After a few minutes, you will see the cream thicken and then break. This is exactly what you want!
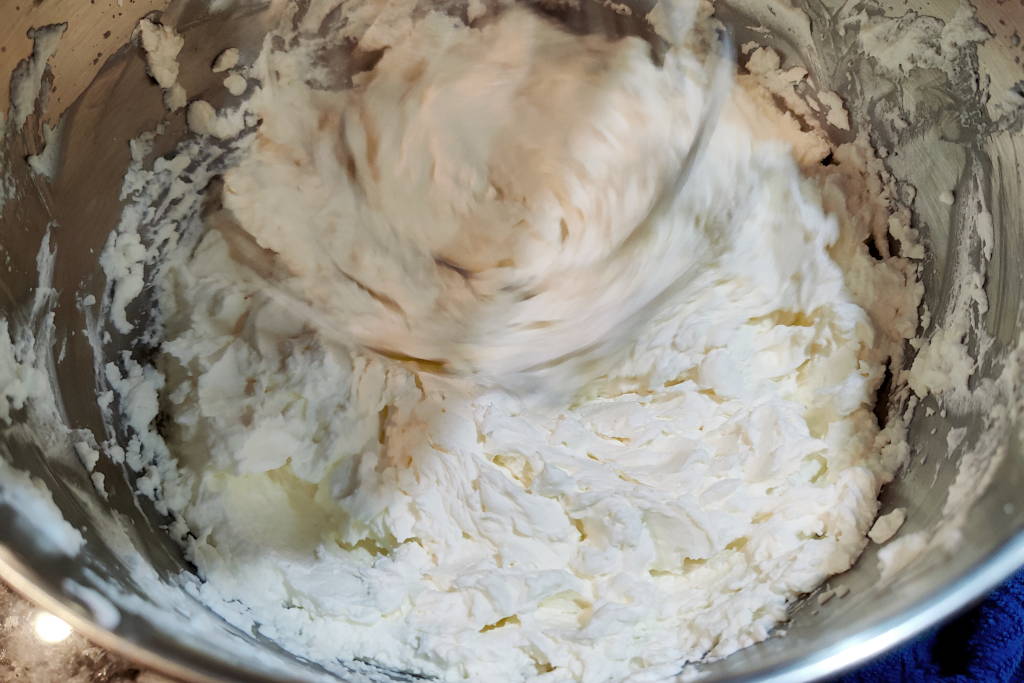
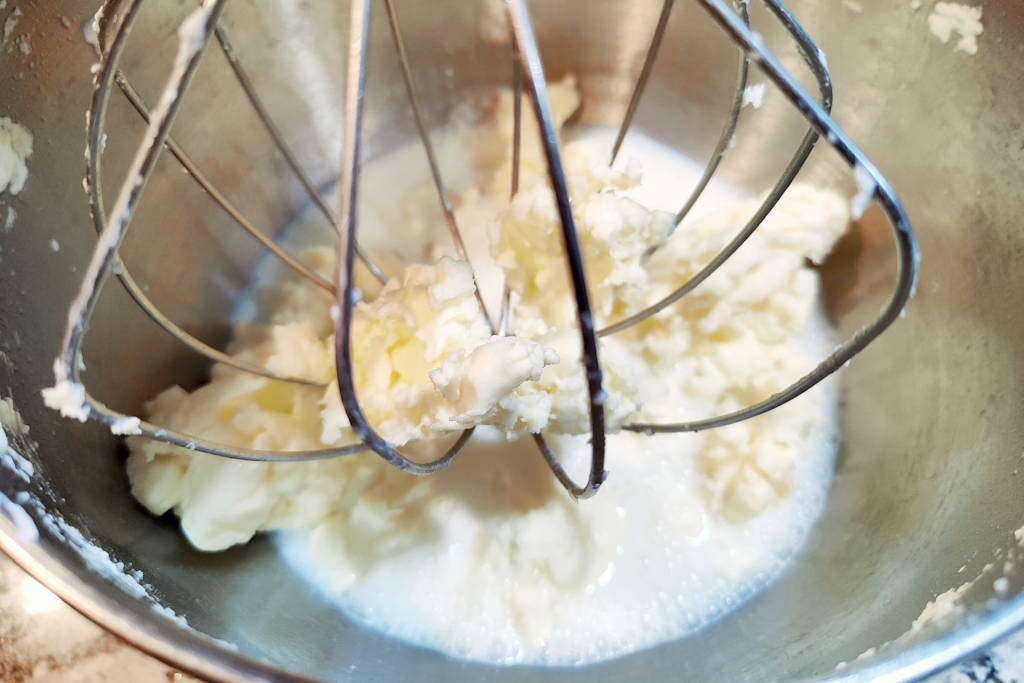
Separate the Butter from the Buttermilk: After a few more minutes, you will see liquid begin to pool at the bottom of your mixer. This is the buttermilk separating from the butter. Keep mixing, and you will see the butter solids begin to fully separate from the buttermilk and begin to stick to the whisk. Once this happens, turn off the mixer. You should have both the solid butter as well as the liquid buttermilk.
Strain the Buttermilk: Set the mesh strainer over your bowl and line it with the cheesecloth. Pour the buttermilk and butter into the cheesecloth, letting the buttermilk drain through into the bowl below. Wrap the butter in the cheesecloth and squeeze it as much as you can, getting as much of the buttermilk as possible out of the butter. The more buttermilk you are able to get out of the butter, the longer the butter will last. Store the buttermilk in an air-tight container in the fridge for up to two weeks!
Rinse the Butter: To help further preserve your butter, rinse it under cold water until the water runs cold. Some people rinse it in a bowl of ice water instead of under the tap, but I have found that rinsing it under cold running water works just fine, too. Just make sure the water is cold, as the butter will begin to warm and soften due to the heat of your hands. Try to do this step as quickly as possible.
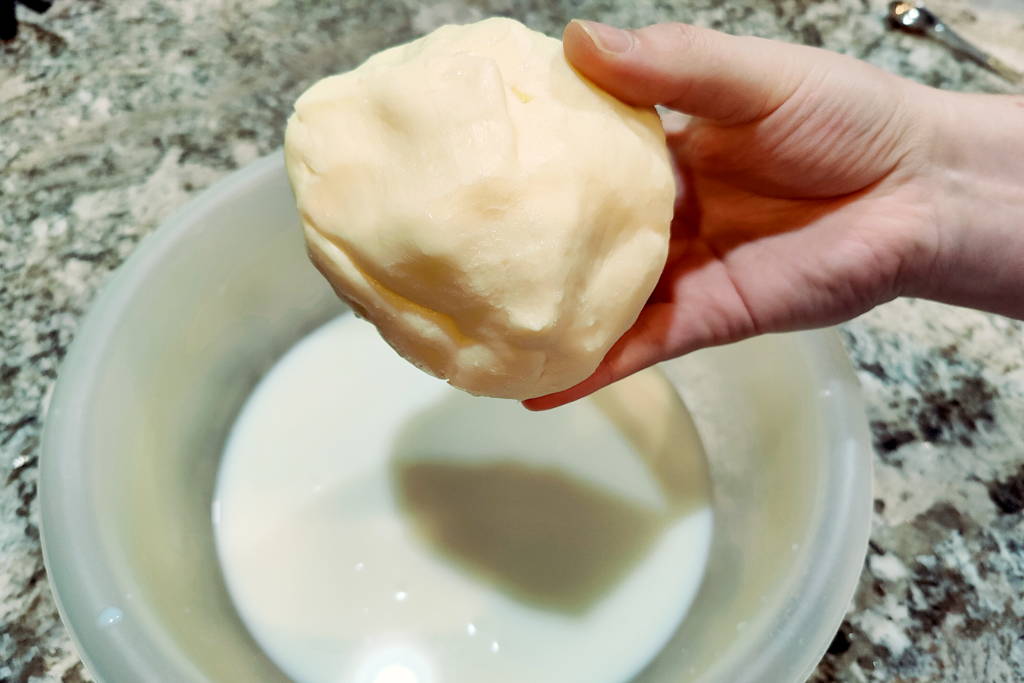
Add the Salt: If you are adding salt to your butter, now is the time to do it. Flatten the butter out on a piece of parchment paper, and then evenly distribute the salt over the butter.
Mold the Butter: You can either skip this step and simply wrap the butter in plastic wrap or scoop it into an air-tight container, or you can press it into a butter mold. I prefer to use a stick mold with tablespoon guides, as it helps to measure out the butter for future recipes, especially if you don’t want to weigh the butter out to use it.
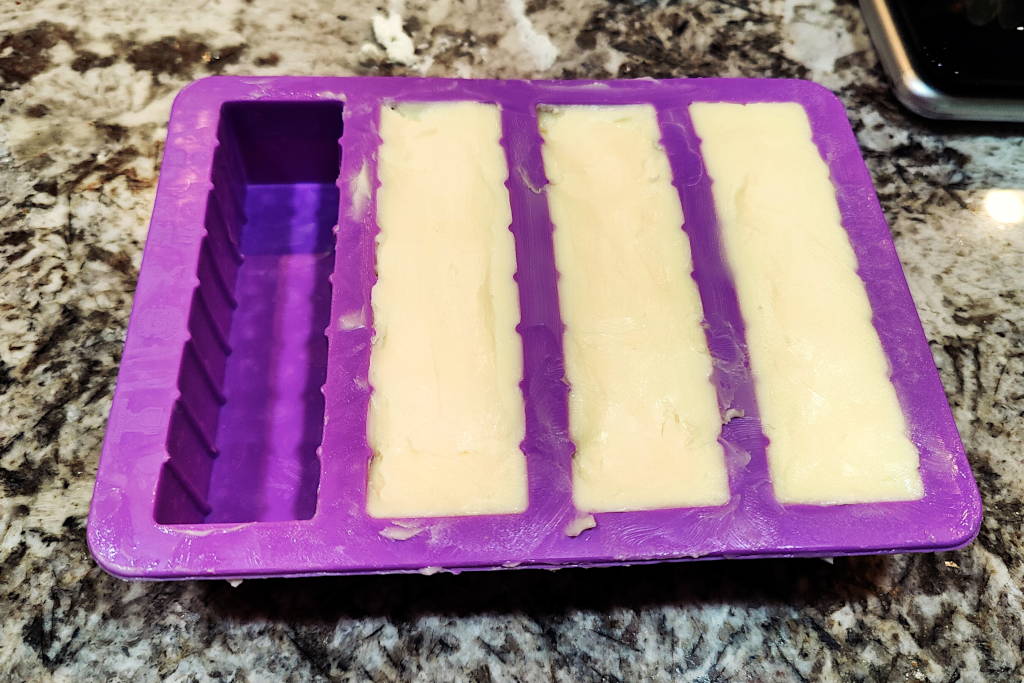
Store the Butter: Homemade butter can be stored at room temperature for up to two days, in the fridge for up to two weeks, or for nine months in the freezer. Keep it in an air-tight container to help it last longer. Since the butter is made with fresh cream, it goes rancid faster than store-bought butter. The shelf-life also depends on how much buttermilk you squeeze out of the butter, as well. A good rule of thumb is that if it starts to look or smell funny, it’s time to toss it out. Because of the short life, it’s best to keep large batches of butter in the freezer until you are going to be using it.
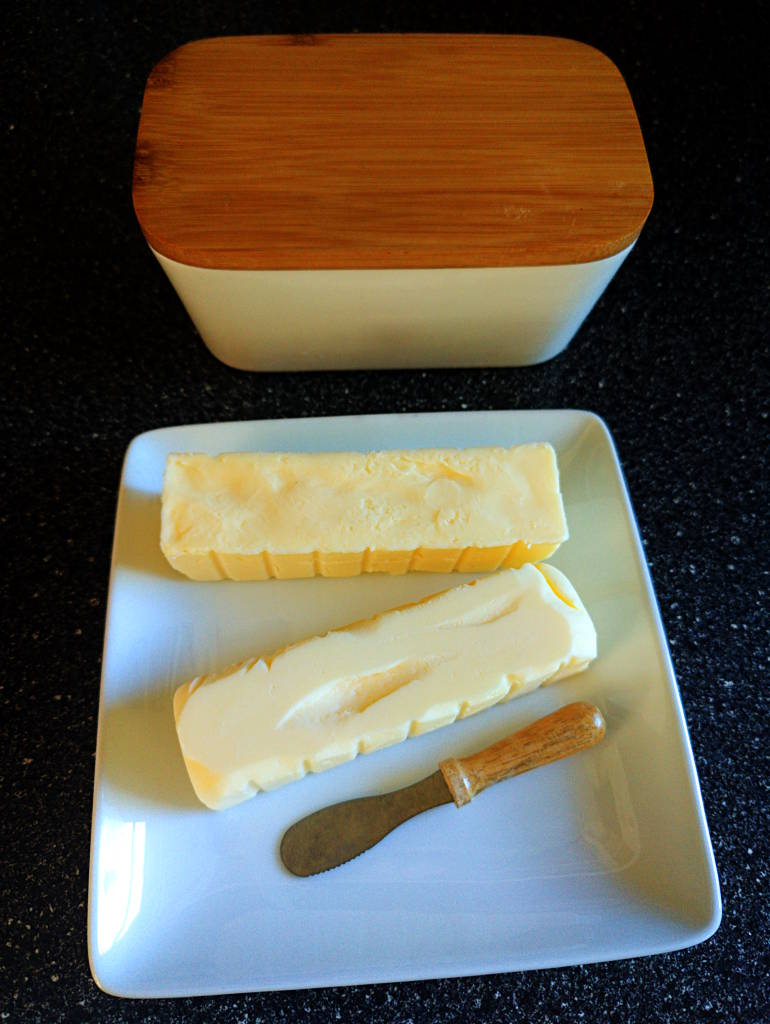
Flavored Butters
While unsalted and salted homemade butter tastes divine on its own, there are times when you may want to flavor it, such as making honey butter for rolls or garlic butter for homemade garlic bread. My favorite three combinations are below, but butter is incredibly versatile. Don’t be afraid to experiment and see what flavor combinations you like and share them in the comments below! I would love to see what you come up with!
To ½ cup (113g) of Butter:
Garlic Butter: Mix in 2 teaspoons of minced garlic and 1 teaspoon of Italian seasoning. If you like cheesy garlic butter, you can add 2 tablespoons of grated parmesan cheese, as well!
This butter is great on toast, pizza crust and slathered over steak, chicken or corn on the cob!
Honey Butter: Whip ¼ cup of honey, and 2 tablespoons of confectioner’s sugar together.
The confectioner’s sugar is optional, but it helps to make a sweeter and creamier honey butter. This butter is definitely more of a sweet treat than an everyday staple! Try using our dandelion honey to make this butter!
Cinnamon Butter: Whip in 3 tablespoons of cinnamon, and ½ cup of confectioner’s sugar until light and fluffy.
This butter is wonderful on toast, bagels, muffins, etc.
FAQ’s
Homemade Butter
*Note: Calories and cost is estimated, if provided.
Equipment & Tools
- Stand Mixer with whisk attachment or Hand Mixer (highly recommended)
- Splash Guard or Towel (optional, helps keep the buttermilk from splattering all over)
- Cheesecloth or Fine Mesh Bag
- Strainer (optional)
- Large Mixing Bowl (optional, if you wish to save the resulting buttermilk)
- Butter Mold (optional)
- Digital Scale (optional)
- Storage Container or Plastic Wrap (helps to preserve the butter for longer)
Ingredients
- 4 cups Heavy cream
- ¾ tsp Fine sea salt (optional)
- Water , cold or ice (for rinsing)
Instructions
Chill
- Place your mixing bowl and whisk attachments in the fridge or freezer to chill for at least 15 minutes.
Make the Butter
- After your bowl is properly chilled, add the 4 cups Heavy cream to the mixing bowl.
- Turn the mixer on to medium-low speed then gradually increase it to high. You do not want to go full blast right off the get-go otherwise it will splatter cream all over. Using a splash guard or towel will help reduce splattering.
- The cream will turn into whipped cream, and then thicken and split, this will take about 15 minutes. Continue whipping until the buttermilk separates from the butter solids. You will know this by there will be liquid pooling at the bottom of the bowl and it will start to splatter.
- Stop the mixer and pour the butter and buttermilk into a cheesecloth-lined strainer, letting the buttermilk drain off of the butter.
- Wrap the butter in the cheesecloth and squeeze as much additional buttermilk out of the butter as possible.
- Rinse the butter either under cold running Water or in a bowl of ice water to get even more buttermilk out of it. The more buttermilk removed from the butter, the longer the butter will last.
- If using salt, flatten the butter out on a piece of parchment paper or clean work surface then evenly distribute ¾ tsp Fine sea salt over the butter. Knead it a bit to disperse the salt throughout the butter.
- Wrap the butter in plastic wrap or press it into a butter mold.
Storage
- Store the butter in an airtight container or wrapped in plastic. It will last for up to 2 days at room temperature, 2 weeks in the fridge, or up to 9 months in the freezer.
Notes
- This recipe will yield about 3 sticks (113g each) / 1½ cups plus an additional 2 Tbsp (28g). Yield varies based on the fat content of the cream used.
Flavored Butters
To ½ cup (227g) of Butter:
Garlic Butter: Mix in 2 teaspoons of minced garlic and 1 teaspoon of Italian seasoning. If you like cheesy garlic butter, you can add 2 tablespoons of grated parmesan cheese, as well! Honey Butter: Whip ¼ cup of honey, and 2 tablespoons of confectioner’s sugar (optional) together. Cinnamon Butter: Whip in 3 tablespoons of cinnamon, and ½ cup of confectioner’s sugar until light and fluffy.Subscribe
Enjoying our content? Stay up to date on all of our latest posts, subscribe now to receive an email every Friday with our new posts of the week!
